Setup of BELL3
1. Make sure your smartphone is connected to Wi-Fi and that your BELL3 device has power during setup.
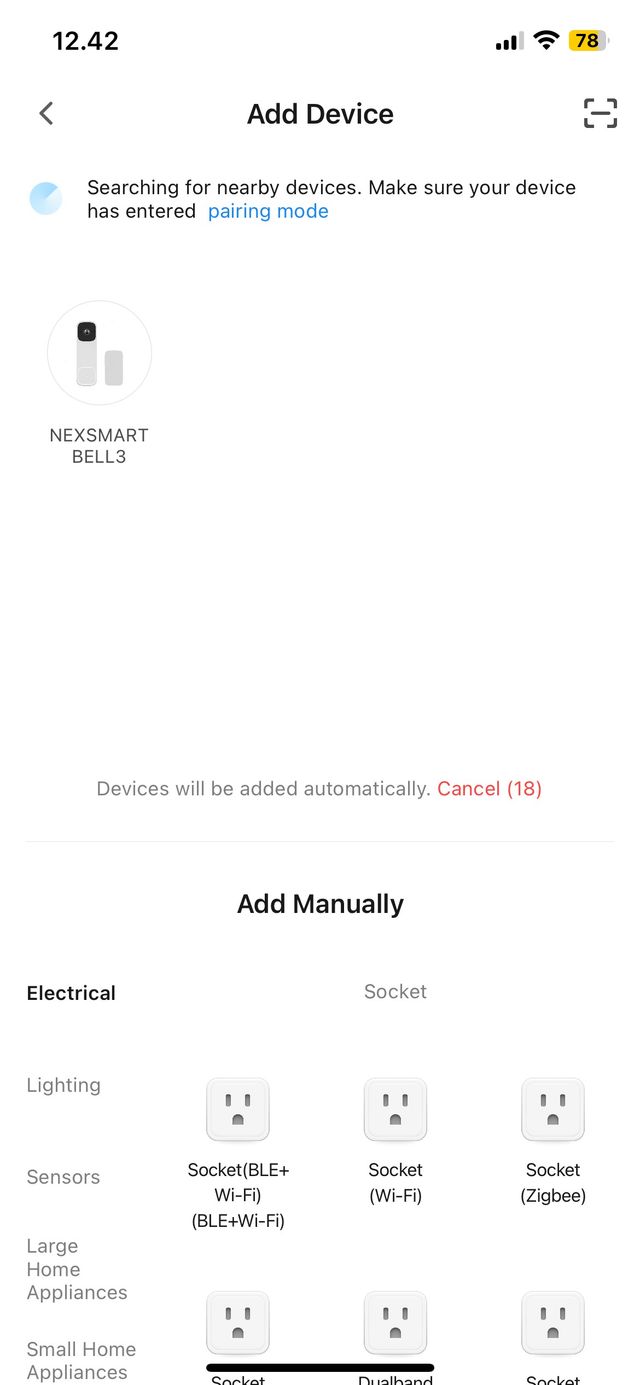
2. Open the SmartLife app and tap + → ‘Add Device’.
3. Your BELL3 will appear at the top of the screen. Tap on it and confirm Wi-Fi and network password. If your device does not appear at the top, you can scroll down on the left side and select ‘Camera & Lock’ → ‘Smart Doorbell’.
4. You can now name the doorbell (this can also be done later) and finally tap DONE.
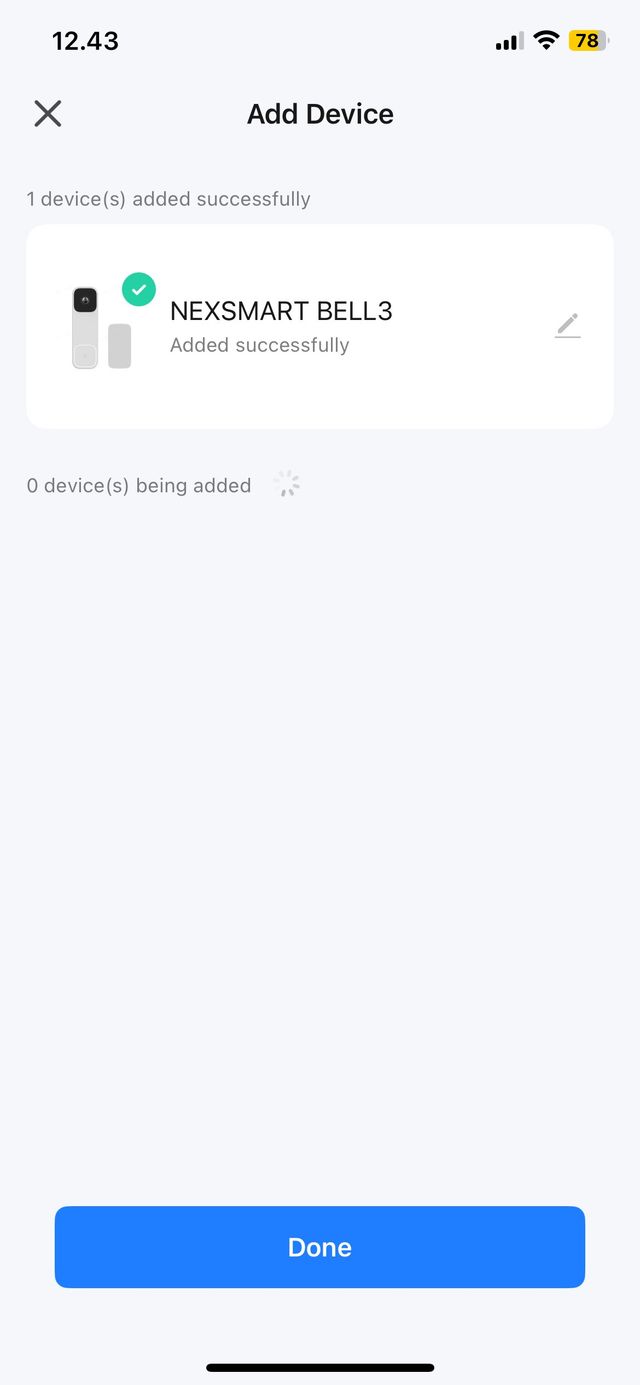
5. Your BELL3 is now connected to the SmartLife app and ready for use.
What do the different settings do?
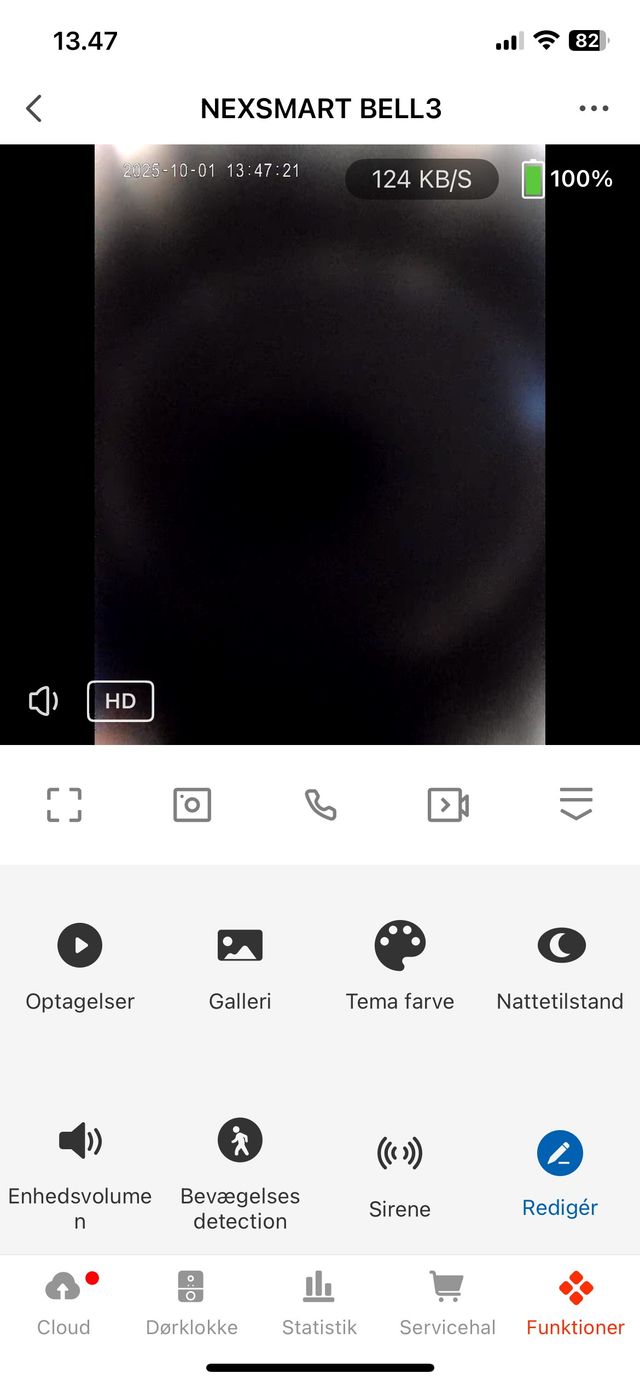
Functions in the sub-menu:
Recordings: When you have an SD card in your BELL3, under ‘Recordings’ you will be able to see all your recordings saved by your BELL3. You can also record video clips yourself by pressing the video camera icon.
Gallery: This is where still images will be stored. If you don’t have an SD card in the device, BELL3 can instead take photos that are saved here. You can also take pictures yourself using the camera icon.
Theme Color: Here you can choose whether your BELL3 should have a light or dark theme color. This only affects this device and not the rest of the app.
Night Mode: When you have enabled Night Mode, the camera will use its built-in infrared lights to see in the dark. This mode makes BELL3 record in black and white.
If Night Mode is turned off, your BELL3 will record in color.
When using Auto Mode, BELL3 will automatically switch between day/night.
Device Volume: The volume on the doorbell can be adjusted from 1 to 10, with 10 being the loudest.
Motion Detection: For your BELL3 to detect movement within approximately 7–8 meters, make sure Motion Detection is turned on. If turned off, BELL3 will not detect movement.
Siren: This function emits a siren sound. It is especially useful if you can see unwanted visitors through your BELL3.
Camera Icon: Takes still pictures that are stored in ‘Gallery’.
Phone Icon: Works as two-way communication. By pressing this icon, you can speak through your phone and out through your BELL3.
Video Camera Icon: Records a video which is saved in your ‘Recordings’.
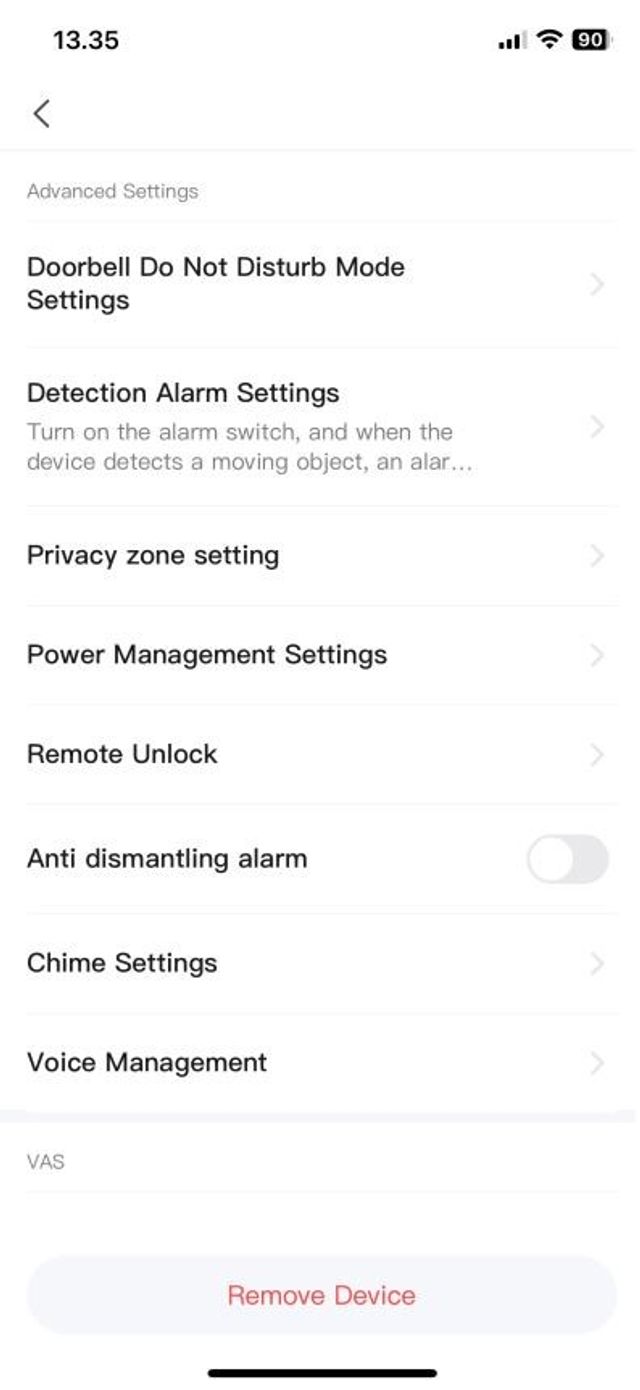
Other settings for BELL3:
Do Not Disturb Settings:
This function means you will not receive video calls on your phone when someone rings the doorbell. Guests can leave a message, and you will later receive a notification in the app.
Connect your CHIME2 to BELL3:
1. Go to your BELL3 and tap ‘Settings’ (the three dots in the upper right corner)
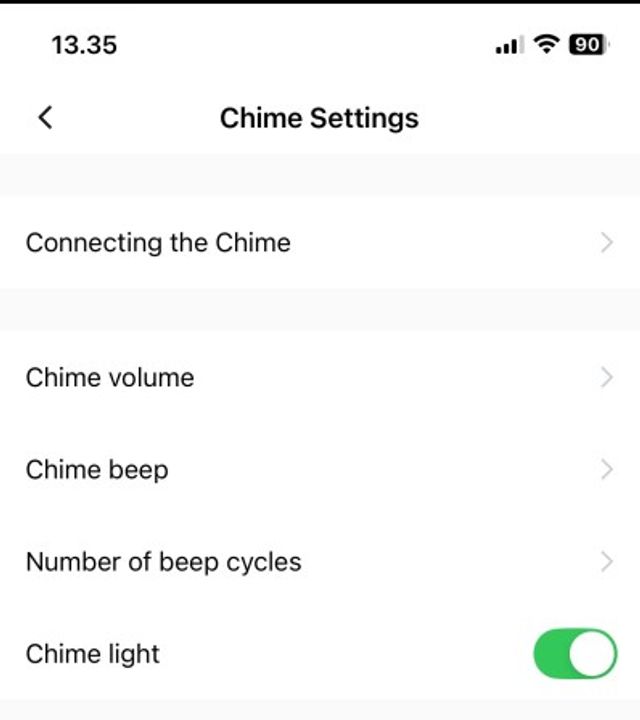
2. Scroll down to ‘Advanced Settings’ and select ‘Chime Settings’
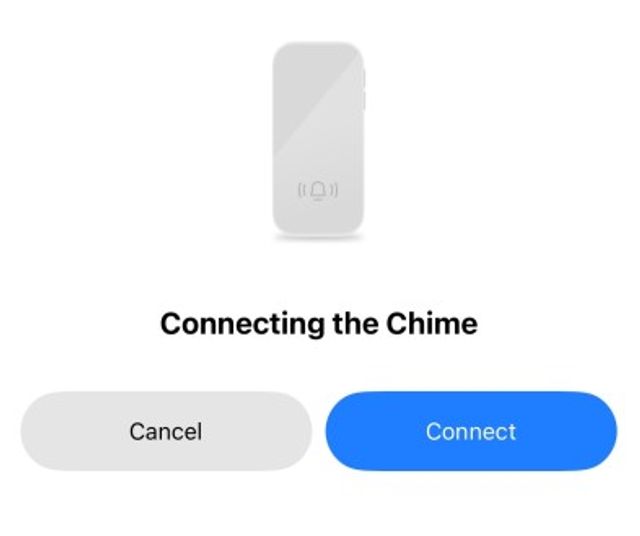
3. Then tap at the top on ‘Connecting the Chime’
4. Tap ‘Connect’
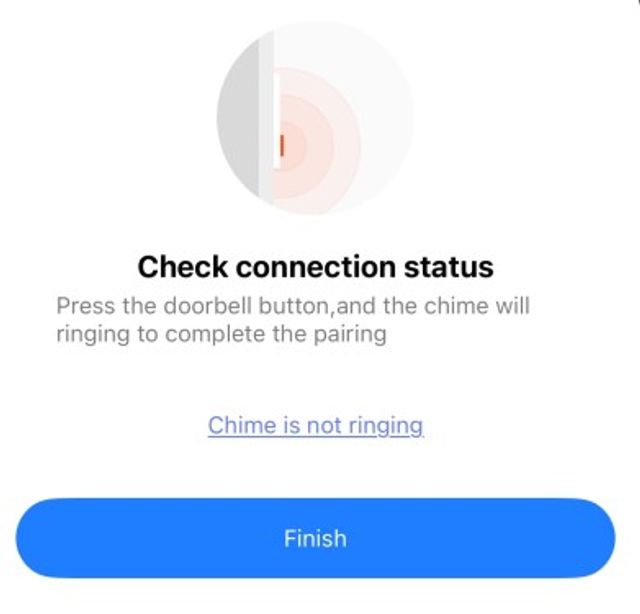
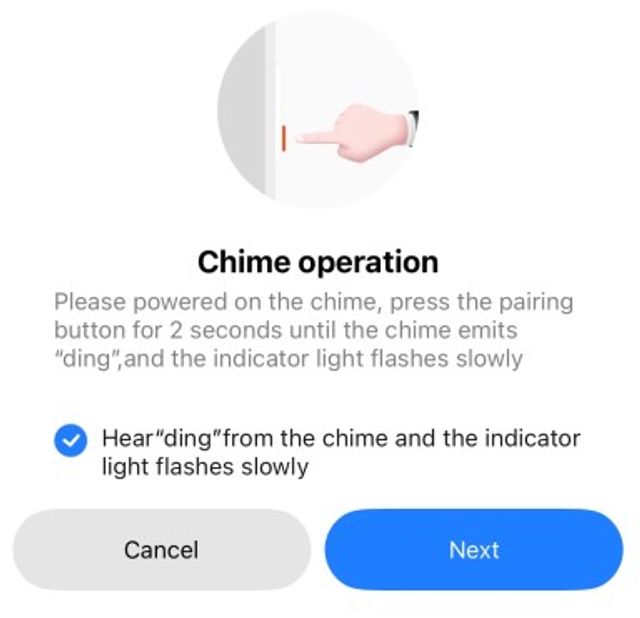
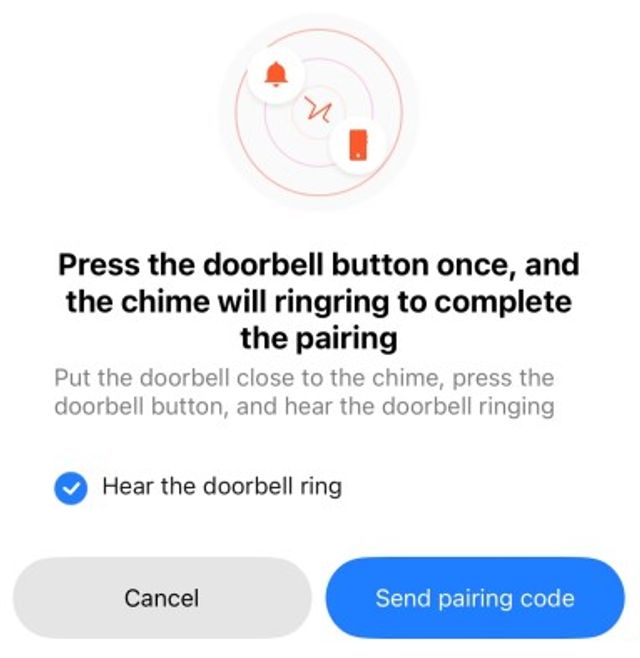
5. Hold the pairing button on your CHIME for 2–3 seconds until you hear a doorbell sound. Your CHIME will then start blinking slowly.
6. Confirm that you heard the sound and then tap ‘next’
7. Press your BELL3 doorbell and confirm that you heard the doorbell sound from your BELL3. Tap ‘Send pairing code’7. Press your BELL3 doorbell and confirm that you heard the doorbell sound from your BELL3. Tap
8. Finally, press your BELL3 again. Your CHIME will now emit a doorbell sound simultaneously with your BELL3. Confirm by tapping ‘Finish’