Preparation of the setup
1. Download & Log in to the Smartlife app
Start by downloading the Smartlife app and create an account. The camera will be set up to your Smartlife account, where you can follow all your cameras.
2. Prepare the camera & your Wi-Fi connection
When setting up the camera, it is important that your phone is connected to your Wi-Fi router. Therefore, you should move close to your Wi-Fi router during the entire setup. You can move the camera to the desired location afterwards.
If you want to record on the camera using an SD card, insert the SD card into the camera now.
3. You are now ready to set up the camera in the app.
Before you start adding the camera in the Smartlife app, make sure the app is installed and your phone is connected to the Wi-Fi router. Now you are ready to start the pairing process!
Pairing process for the Smartlife app
1. Turn on the camera & prepare it for pairing with the app
Start by turning on the camera by simply plugging it into a power outlet. When the camera is ready for setup, you will hear a beep sound. Once you hear the indication that the camera is ready for setup, you can move on to the next step.
Note: In some cases, it may be necessary to reset the camera to start pairing mode. This is done easily and quickly by holding down the reset button for about 3–5 seconds, typically located on the back of the camera near the SD card slot.
Note: In some cases, it may be necessary to reset the camera to start pairing mode. This is done easily and quickly by holding down the reset button for about 3–5 seconds, which is typically located on the back of the camera near the SD card slot.
2. Open the app and start the setup
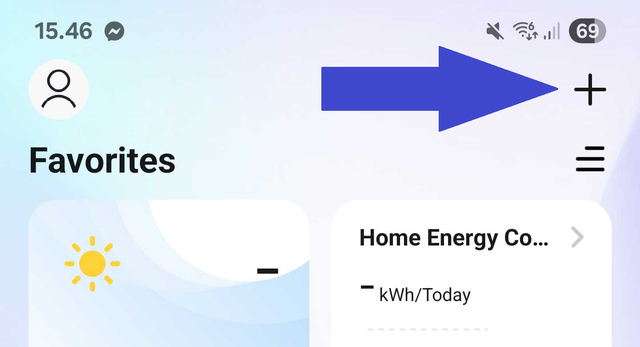
You are now ready to open your app and navigate to the home screen, where you can add products. Then find the plus sign and tap it. Select “Add Device”, which will prepare the app to find your camera.
Tap the plus sign to open the menu.
3. Scanning & selecting the camera
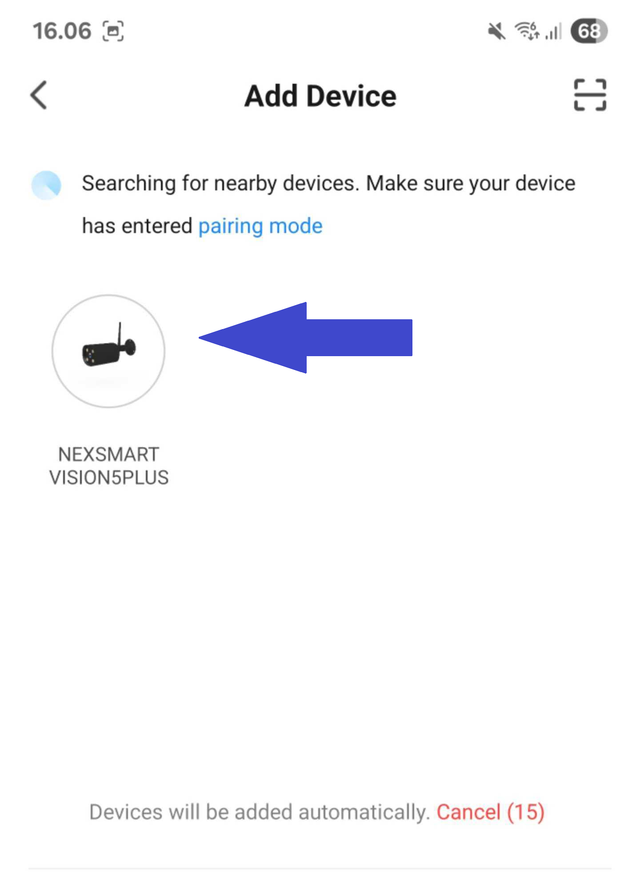
Find your camera on the list and tap it. The camera will now connect to your Smartlife app and account.
Note that on some models, it may be necessary to add the camera manually. This can be done by scrolling down the list to “Camera & Lock” and then selecting Smart Camera. This applies to VISION4, AIR3, VIEW & LOOK as well as other models that are no longer sold.
See how to add the camera manually here.
Selection of camera. Note: the camera only appears on the list when it is in pairing mode.
4. Select the desired Wi-Fi connection
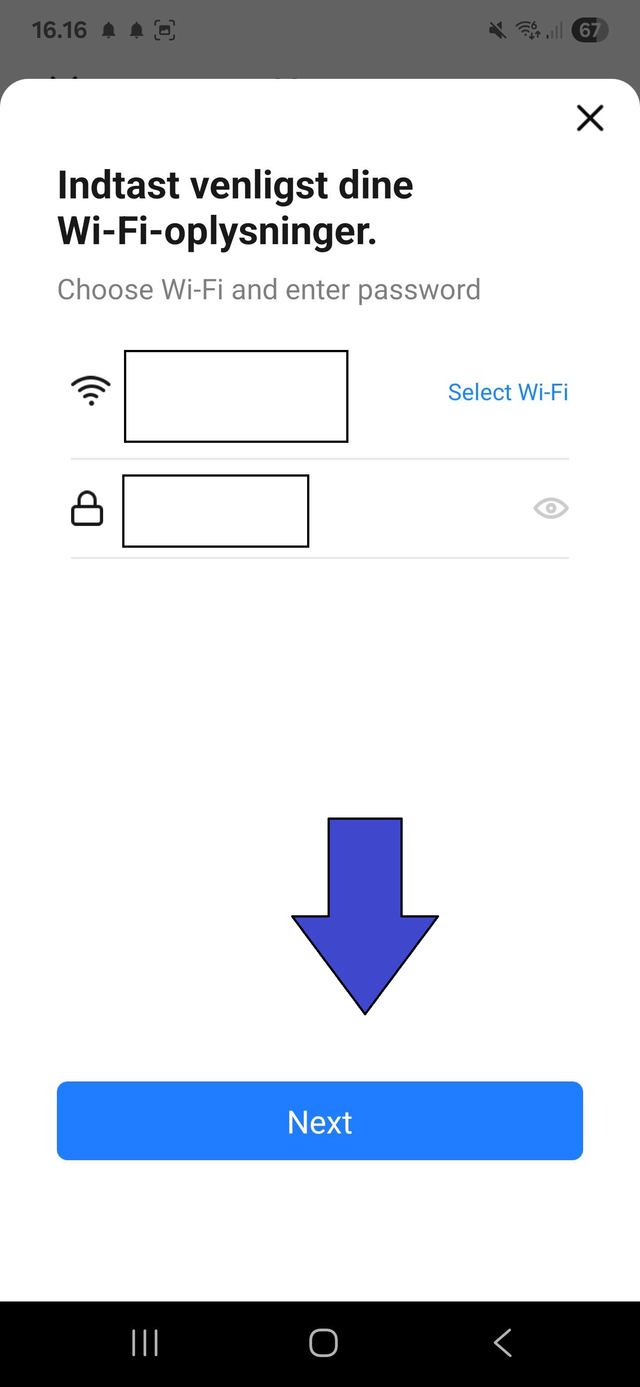
Now select the desired Wi-Fi connection. Once you’ve selected the connection, tap Next.
Here, select the Wi-Fi network that the camera should connect to.
5. Your camera will now be added to the app
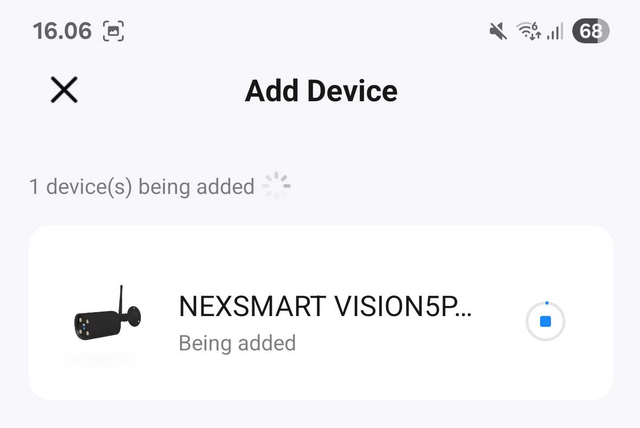
Your camera should now be in the process of being set up. Note that this process can take up to 2 minutes. Do not turn off the camera or move it away from the Wi-Fi router during this process.
The camera is now being connected to the app.
6. Success! Your camera has now been added to the app
Your camera is now ready for use, and you can move it to the desired location! The camera will automatically reconnect to your Wi-Fi router when it is turned on again.
At the bottom of this article, you’ll find help to get started with your camera, as well as tips and tricks.
You’ll also find our troubleshooting guide if the camera was not set up correctly.
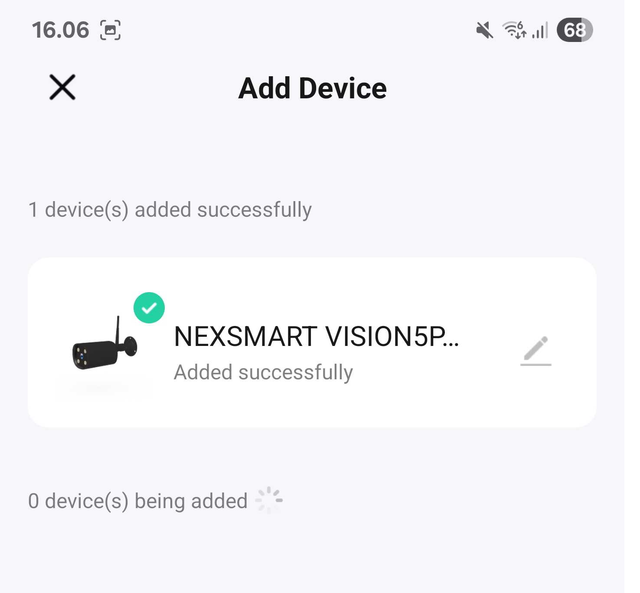
The camera has been added successfully
Nyttige artikler:
Troubleshoot: My camera was not added :(
How to use Camera How do I use my camera?